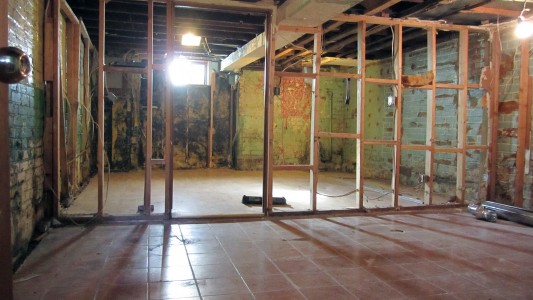
The first “major” renovation project we are tackling is the basement demolition. Even though the basement is technically “finished” the quality of it is so bad that we are not currently using the space down there for anything other than storage. Besides being a time-warp to the 70s (orange walls anyone?) there were some actual concerns we have with the basement:
- Constant dampness
- Old kitchen in bad condition
- Old bathroom in unusable condition
- Ductwork running down the middle of the room
- Aging furnace that is past its lifespan
- Aging hot water heater
- Suspect wiring
Since we plan to tackle the mechanical aspects of the house, install a new furnace, new hot water system and replace the electrical panel and update the wiring (which is a disaster) it just made sense to do a total gut of the basement. This way we have a blank slate to start from. We are a bit afraid of what might be hidden away under the drywall but you’ll never know unless you open it up so here we go!
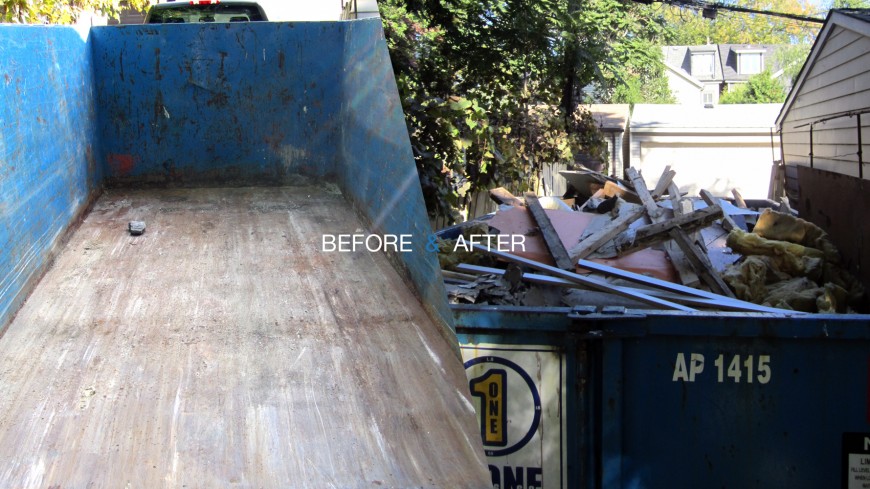
First things first… There were a few things that we couldn’t do ourselves. We need a gas fitter to disconnect the stove downstairs and we need a waste removal service for all of the debris. You can see in the picture the one we got completely empty and then filled up after the demo. We couldn’t get a bin any larger than this because our house backs onto a laneway and no truck would be able to get back there to drop it off or pick it up.
As with all 3rd party services we employ we had to do a bit of research in deciding what kind of bin to use for getting rid of all the demo waste. We first considered a “bagster” after seeing all the ads on TV but the cheap purchase price ($39.99 at home depot) is considerably offset by the price to pick it up – almost $200!!! For its smaller size we didn’t think the value was there so we kept looking around.
In the end the bin we ordered was through a company called Waste One Disposal. It had a base cost of $200 and then a dumping cost which is based on weight (This seems to be the standard way of pricing junk removal). The company was familiar with our neighbourhood so assured us it would fit. They were really responsive when we requested a quote and their prices were reasonable. They even called us the day before as a reminder. The only negative we experienced was that they actually charge the full amount of the dumping cost to your credit card right away and then it takes over 2 weeks to refund the difference if the actual weight of the dumping cost is less.
In addition to the dumpster and a gas fitter, here is a list of basement demolition tips, our “Demo Day Essentials” we got in preparation (or already had, or were able to borrow):
- Volunteers (family, friends… anyone looking to relieve some stress by bashing through some walls! This is the most important “essential” and the key to a successful demolition)
- Masks (be prepared for a LOT of dust)
- Work gloves
- Safety glasses
- Garbage bin (fill then haul to dumpster, makes for fewer trips)
- Garbage bags
- Hammer
- Sledgehammer
- Prybar
- Plastic sheeting
- Duct tape
- Electrical tape
- Reciprocating saw
- Broom and dustpan
- Case of water, coffee, food (a hydrated and caffeinated volunteer is a happy volunteer)
Before work started we had to move all of our items stored in the basement to a room on the main floor that we aren’t using for much (it looks like an episode of hoarders now). We also took some time to tape up plastic sheeting around the entrance to the basement and on the cold air return to minimize the dust spreading to other floors.
Stay tuned for our “after” pics and a recap of what we found underneath all that drywall. (Here is a preview… Yes, that is Christmas wrapping paper pasted right onto the bricks – yikes!)


Comments